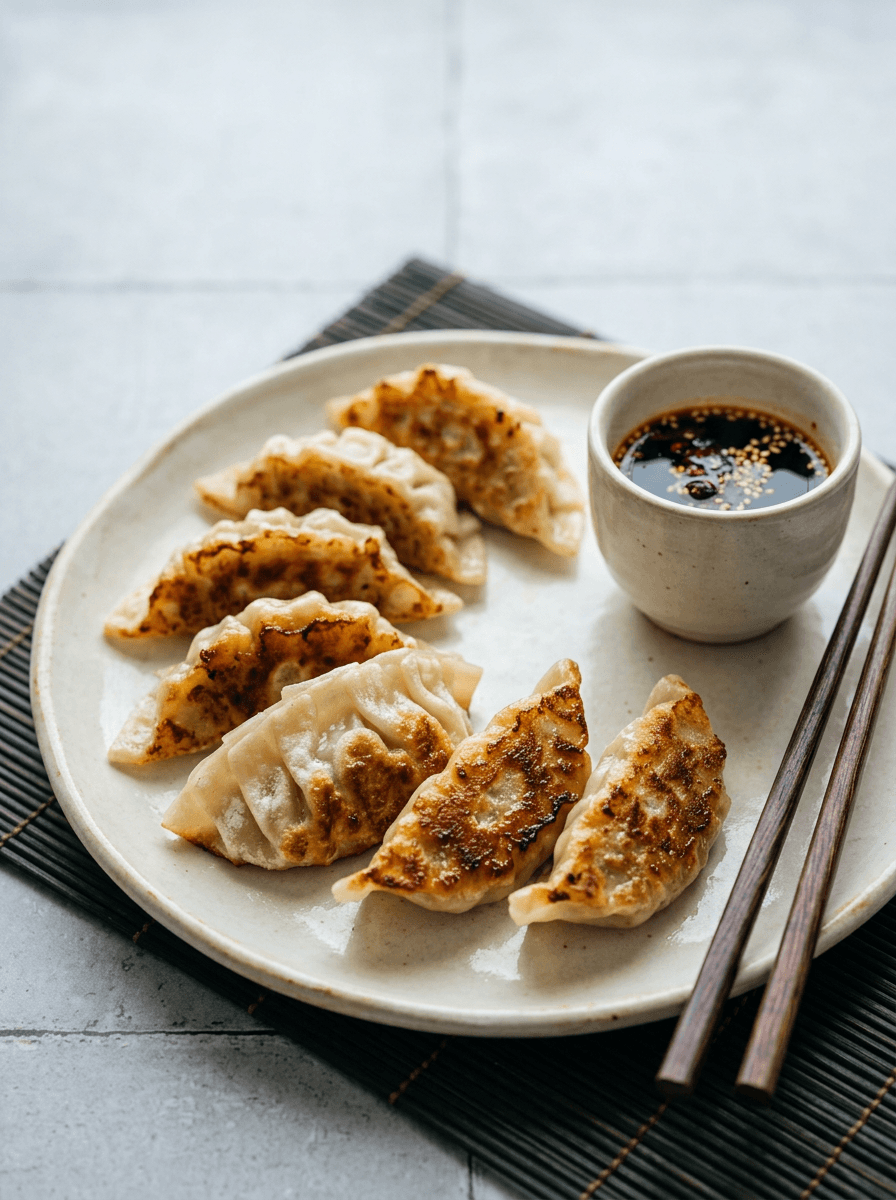
Crispy bottomed, juicy inside, completely addictive. Making gyoza from scratch including the wrappers sounds ambitious but the process is straightforward and the result is in a completely different league to shop bought. Worth every fold.
A note from us
Making the wrappers from scratch takes more time but the texture is completely different to shop bought — thinner, more delicate and they hold the filling better without becoming doughy. If you are short on time, shop bought gyoza wrappers from an Asian supermarket are a perfectly acceptable shortcut and still give excellent results. All ingredients in this recipe are available in most large UK supermarkets. For anything you cannot find locally, a good Asian supermarket or Amazon will have it. Garlic chives (nira) are the traditional Japanese choice for gyoza filling — if you can find them in an Asian supermarket they add a distinctive flavour that spring onions cannot quite replicate. Spring onions work perfectly well as a substitute which is what we use here.
What you need 🛒
For the best flavour make the filling the night before and refrigerate overnight. The seasoning penetrates the pork more deeply and the result is noticeably better.
How to make it 👨🍳
Make the dough: add the boiling water gradually to the flour, mixing with a fork as you go. Once cool enough to handle, knead by hand for 5 minutes until smooth and elastic. Wrap in cling film and rest for 30 minutes — this is essential, it makes the dough pliable enough to roll thin.
Salt the shredded cabbage and leave for 10 minutes. Squeeze out as much water as possible with your hands — wet cabbage makes soggy gyoza.
Mix the pork mince, squeezed cabbage, garlic, ginger, soy sauce, sesame oil, sake, spring onions, white pepper and salt together until well combined. Fry a small piece in a pan to taste and adjust seasoning.
Divide the rested dough into 24 equal pieces. Roll each piece into a thin circle about 9cm across on a lightly floured surface — the edges should be thinner than the centre.
Place a heaped teaspoon of filling in the centre of each wrapper. Do not overfill — the edges need to seal cleanly. Fold the wrapper in half over the filling and pinch the centre to seal. Then make 4-5 small pleats along one side pressing each pleat firmly against the flat back of the wrapper. This is the classic gyoza fold — it takes a few attempts but comes quickly.
FOR PAN FRIED: Heat vegetable oil in a non stick pan over medium high heat. Place gyoza flat side down in a single layer. Fry for 2-3 minutes until the bottoms are deeply golden and crispy. Add 60ml water to the pan and immediately cover with a lid — it will spit. Steam for 3-4 minutes until the water evaporates completely. Remove the lid and fry for 1 more minute to re-crisp the bottoms.
FOR STEAMED: Place gyoza in a bamboo steamer lined with parchment paper. Steam over boiling water for 8-10 minutes until the wrappers are translucent and the filling is cooked through.
Mix the dipping sauce ingredients together. Serve the gyoza immediately with the dipping sauce alongside.